
We are planning a trip to Kyoto on 5 April 2012, which happens to be the cherry blossom season!
As usual, limited sessions available, so those interested in photoshoot there, please drop us an email at evangeline@lyricalmoments.com
🙂
![]()
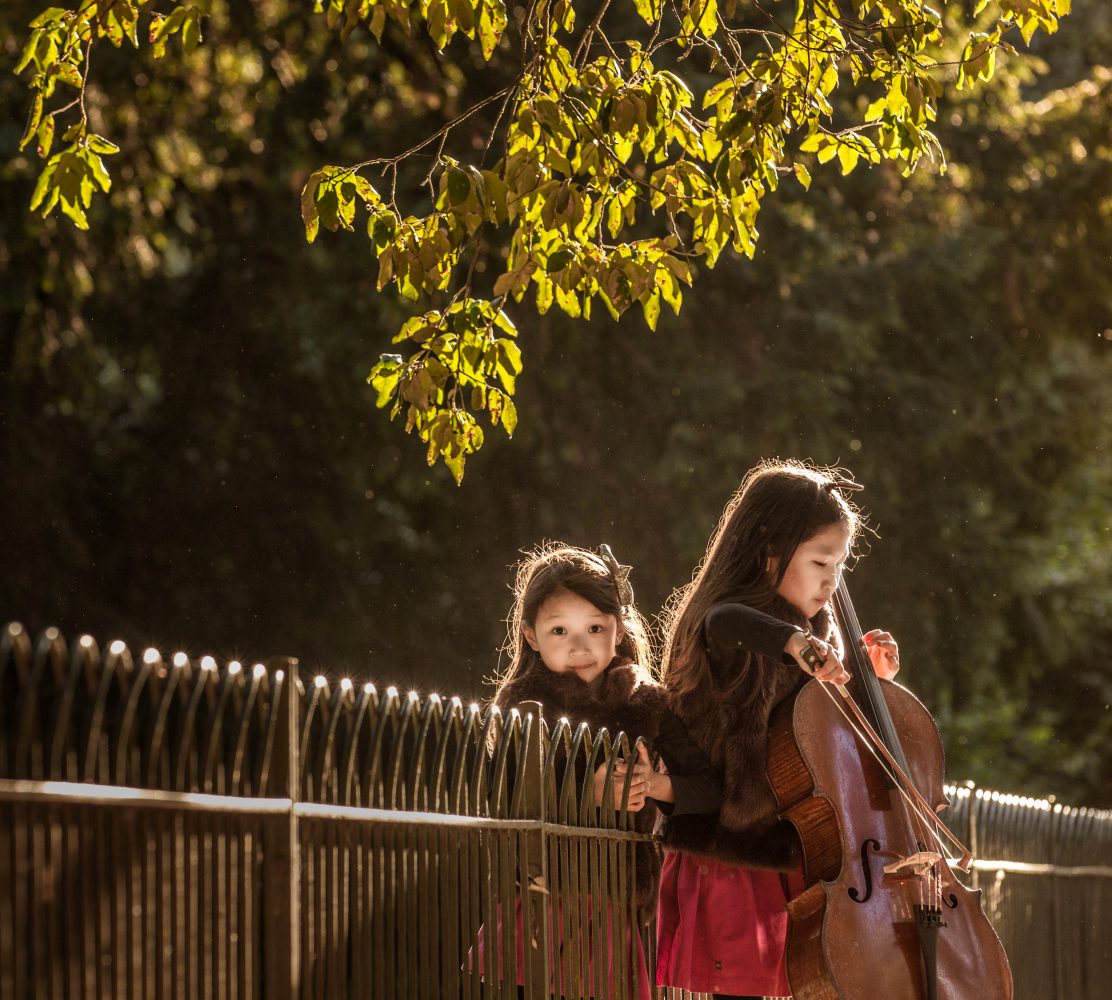
Photographs taken all over the world, from classic elegance of Europe, and exotic flare of Morocco.
We are planning a trip to Kyoto on 5 April 2012, which happens to be the cherry blossom season!
As usual, limited sessions available, so those interested in photoshoot there, please drop us an email at evangeline@lyricalmoments.com
🙂
![]()
The past two weeks had been really exciting, apart from the massive work preparing for print competitions, I was working with RadLab, the latest Photoshop plugin tools from TotallyRad! and here’s my humble review of it.
Being a fan of TRA or Totally Rad Actions since 2008, I have been following the developers on twitter and RadLab is something that I can’t wait getting my paws on…So what’s the big deal about RadLab?
My setup
PC Intel i7 920 CPU @2.67 GHz
12 gig ram
Windows 7 Ultimate edition 64-bit
Photoshop CS5
Images used for this review are either shot with a Hasselblad H4D-40 or Canon EOS 1Ds mk III. All images are edited in their full resolution.
The Stacking game
I love the RadLab interface! The developers have certainly thought of how workflow is carried out, starting from Basic Adjustment from the top, the familiar TRA actions in the middle and sharpening at the button. Do note that the order in which the effects are applied does make a difference – for example, the vignette from EZburn looks very different if it’s place on top or below another effect say Pool Party. It does take a bit of arranging to find out what’s best for you and that’s what RadLab is all about – mixing and matching the effects first, and then saving the formulas for images later.
This is one example of how I stacked 5 effects together. The image is shot with a Hasselblad H4D-40, a 40 megapixels digital medium format system. The raw file is rendered using Phocus, the Hasselblad’s proprietary software before pulling it into RadLab.

Stacking up 5 effects
*A little tip. Always start with an image with low contrast. When I render my raw files, my black point is ZERO all the time and I do give a slight bump to shadow fill of about 10-20% to have the maximum shadow details possible. Since most of the actions tend to add contrast to the image, working with a high contrast image will be tricky.
The histogram on the bottom right is a really nice feature, especially a kind reminder to go easy with the actions. Click on the ‘Finish’ button and bang! Check this out…

RadLab adds contrast, punch and character to the image; highlights and shadow details are well-controlled and just look at how 3D the details are, especially subject’s face and the building behind on top right. I’m sure my clients who flew all the way from LA to Singapore for this photo shoot will be quite please to see this.
Here’s another example that stacks 6 Stylets, just look at how easily we apply all these without cracking up the image…

Still going strong with 6, no compressed highlights or shadows
Dejavu – Remembering and saving the settings
One of the neatest features of RadLab is that it remembers the last few recipes that you have used, and to top it off, you can even saved them as your own favourites! Prior to RadLab, all my important work files are saved in un-flattened PSD format so that I can remember the opacity of each adjustment layer that I have applied, which also allows me to go back and make changes to it. I cannot tell you how much memory space these PSD files do take up especially when we stack like 6 actions (especially the Hasselblad files in full-res), it’s just mad, really. The great thing about Radlab is, we can now apply the same effect over the same series of images for consistent results, without those additional space hogging layers! This is also particularly useful when we are doing an album, a good two-page spread is really about the consistency across them and since all the images within are point of reference to each other – it just takes one to be out of place to ruin the entire spread.

This is money - History and option to save them as favourites!
Black and White
Bitchin B&W and Boring Old B&W are 2 monochrome effects that I have been using since the first version of TRA back in 2008 and they are now amongst of the list of Stylets in Radlab. The effects are now much easier to adjust, thanks to the sliders…and even bigger thanks to the fact that I can now apply easily the tweaked B&W settings across a series of images. To add icing to the cake, the two familiar colour temperature adjustment actions Warm it up Kris! and Cool as a Cucumber, can be used to tone the monochromatic images warm or cold respectively.
Here’s one example with BW Red filter (neutral)

BW Red Filter with Obvious Glass

BW Red Filter with Obvious Glass + Warm it up Kris!

BW Red Filter with Obvious Glass + Cool as a Cucumber
Quick note: Warm it up Kris and Cool as a Cucumber at 60% and 70%.
Same Same but different
Those of us who are familiar with TRA actions would see some familiar faces in RadLab, such is Techno Color Dream World, Pool Party, Rusty Cage, etc. There are some subtle difference between running the same action via TRA 1 or 2, and through RadLab itself. Here’s one example using Pool Party straight for both instances (no adjustments or tweaking to the layers), and while the character is the same, there’s a slight difference in the contrast.

Same Same but Different
Things just get better
The good folks in TotallyRad! do take feedback seriously and implement changes and improvement to their product. Rusty cage is one action that I find a real pain to use wholesale in TRA, shadow and highlights details tend to go wild, the glow, oh mine the glow…There’s a good reason why there’s a slider for the a lot of the actions that provides ‘Glow’ , check this one out:

Finally an easy way to fine-tune the Rusty cage effect
Comparing it to the original image, it’s a huge amount of drama and depth RadLab has added:

Now, this is Rusty Cage on the money
Other tasty and yummy Stylets that you can look forward are the Boutwell Magic Glasses. Check out this image that I took at a destination wedding in Marrakech, Morocco – ND2 filter was deployed and a single 400w strobe was used for the image. 3 different sharpening methods were used and here are the results in a glance:

Check your Glasses!
One of my biggest issues with the original Boutwell Magic Glasses is that it adds halos to the image, especially in areas where there are high contrast; Boutwell Magic Glasses II is a little more controlled and conservative, but it takes care of the halos; Obvious Glasses is the obvious choice here as not only does it add contrast to the image, it gives it a right amount of saturation boost here. I can also see Obvious Glasses as a good everyday Stylet, useful for creating proofs for the customers.
My Wishlist for the next version…
For those who are new to the TotallyRad! family, RadLab is a great introductory tool, think of it as a sampler before buying TRA 1 & 2. For those who are already using TRA in their workflows, RadLab is a great platform and colour palette to encourage the users to think out of the box – no excuse for not being able to come out with their own recipes and concoctions. The endless creative permutations and possibilities is what makes this software a joy to use.
Parting notes
![]()
Dear all,
We have confirmed trips to
UK (London/ Newcastle) in early Oct 2011
Melbourne in last week of Oct 2011
Melbourne in early April 2012
San Francisco /LA in July 2012
Those interested in joining us or would like to meet up with us for a coffee, please drop me an email at stephen@lyricalmoments.net .
![]()
Following my previous post on overseas bridal photography in London, we are going back to the charming city of Central London and possibly New Castle this coming October. This is one place that I have been visiting every other year since 2008 for overseas photography sessions.
Those who are keen to join us, please drop me an email at stephen@lyricalmoments.net asap! 🙂
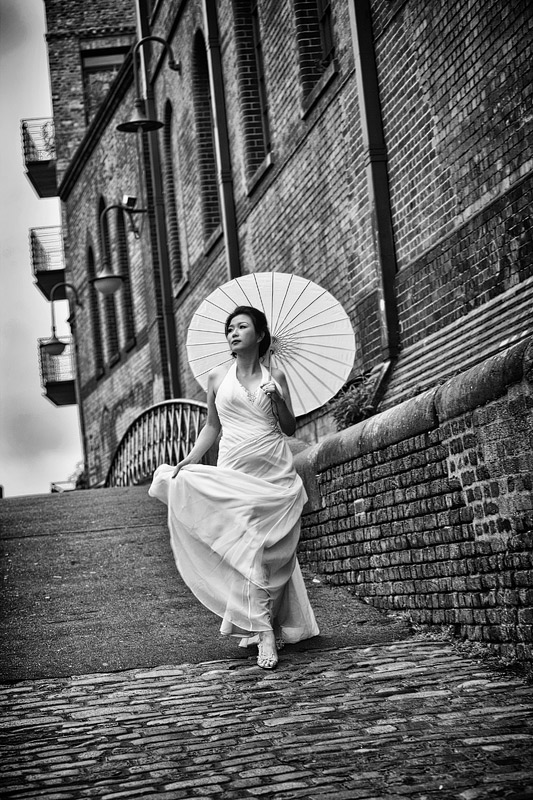
And one of my all-time favourites photographed in Bath, UK

Beautiful Parisian bridal gown 'twirled' in Bath, UK
![]()
One of the biggest challenges for outdoor photography in Singapore is working with rather harsh lighting from the sun. Some might argue that we have the same sun throughout this solar system, but having done assignments in various part of the world, I’d say that not only is the quality of light very different (the angle in which the light strikes on different part of the world seems different), we have a much longer duration of good light.
A typical outdoor photography session in Singapore usually gives us about 2-3 hours of good quality light, around 4pm to 7pm; in the last shoot we did in Melbourne, we had 7 hours of good light during summer.
To add salt to the wound, clear skies with nice dramatic is a rarity, and even when it happens, chances are that there will be little contrast between the clouds and the sky in what most people describe as a ‘washed-out’ sky.
What photography books will teach you is to use a flash to balance the exposure. Yes, this method works but Skye Tan, a renowned fashion photographer in Singapore, shared with me his technique of using ND filters for outdoor photography and I can never thank him enough for that. The idea is to use a neutral density (we’ll call it ND) filter in front of the lens, which not only help to trim down the exposure for the sky and rendering it blue, but also, it improves the contrast between the clouds and the sky. Using a higher flash shutter sync will make the sky darker, but somehow those shot with the ND filter gives a better sky-cloud contrast.
And I thought lighting in Singapore was harsh enough, until my assignment in Morocco. Just a week before my trip to Marrakesh in Morocco, a Master Photographer from UK, Kevin Wilson, shared with me how harsh light can get over in the North African city and I went with the ND2 and ND4 filters. How good are these filters? Well, looking back now, I feel that they made my trip worthwhile!
So what exactly does ND filters do? Here are some examples:
This is shot by Don Lim, another photographer who was assisting me for this photo shoot. I got him to take this photo for comparative study later and the image is quite closed to how the scene looked like that morning @9am. This is done with post-production for the skies to make it look bluer. The intention of this image is not to show how bad it look (this image looks fine actually), but how much more potential you can get out of using filters for the same scene.

Shot with an ND2 filter with the strobe. . Look at the details and texture that we could get from the 4 brick structures, as well as the floor, even under such harsh lighting. There’s very little post-production work that I did to this image to achieved to get this look.

We proceeded to the palm area and at 10am, we needed to trim off even more light from the sky and out came the ND4 filter from the bag. Compared to the ND2, the ND4 filter cuts down by 2 stops instead of 1.

More examples from Singapore:
I managed to get the sky details without having to do any post-production to the picture. This was shot on a seemingly cloudy day.

One more example from a recent photo shoot in Singapore under extremely harsh 12 noon sun. Again, look at how the filter managed to tame the scene down. Very little or no post-production work was required to bring out the floor or skies details. The warm tone and sky colour is applied in post-production.

In conclusion, are ND filters a good investment? Yes, they can be inexpensive if you know where to buy them (Ebay & B&H are my best friends). No doubt, some might argue even if we don’t use an ND filter, with some more post-production work, we might be able to achieve the same effect. But that means additional work in Photoshop and in wedding photography, we deal with not one, but a series of images from the same scene for the clients’ album – attempting to do post-production on every image with the consistent amount of dodge/burn can be a nightmare and certainly a tedious task.
If you’re not convinced, you can always try it out with the cheaper ones out there (there are some good buys over Ebay) for a start. Once you’re comfortable with it, you might want to upgrade to better quality ones like Lee filter or Tiffen.
To end off, many thanks to Skye Tan for his generous sharing of knowledge and techniques on how to bring the Skye sky out in the image 🙂 Also, thanks to Don Lim, for his permission to use the image for educational purpose.
![]()
Lyrical Moments is organising another photoshoot in London and UK this Oct 2011. Bookings are limited and we will accommodate another two more sessions. Those interested to join us please contact stephen@lyricalmoments.net . Have a great weekend ahead! 🙂

![]()
Getting out of my comfort zone is really something that I’ve been working on since 2010. Ask any photographers out there and they’ll tell you all the places that they like to do a shoot in.
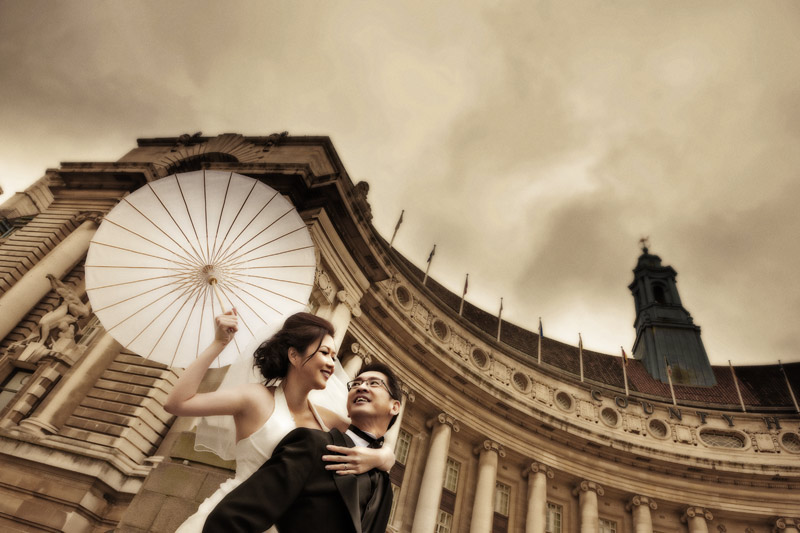
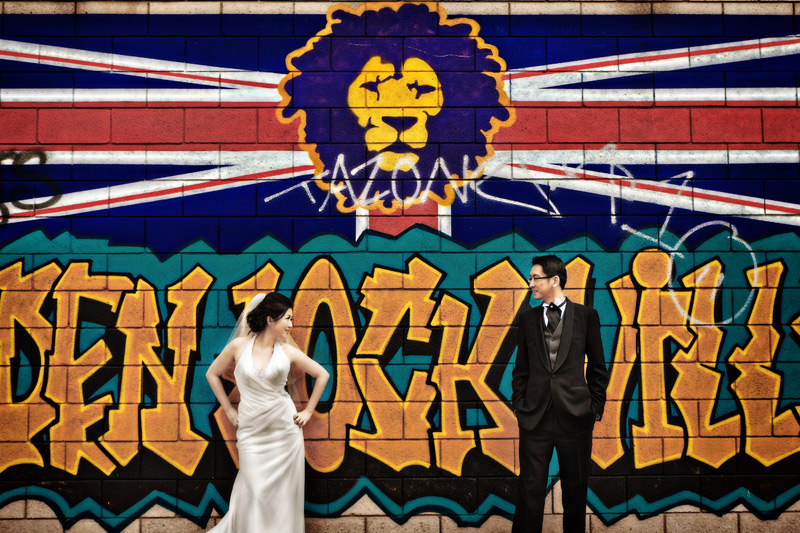
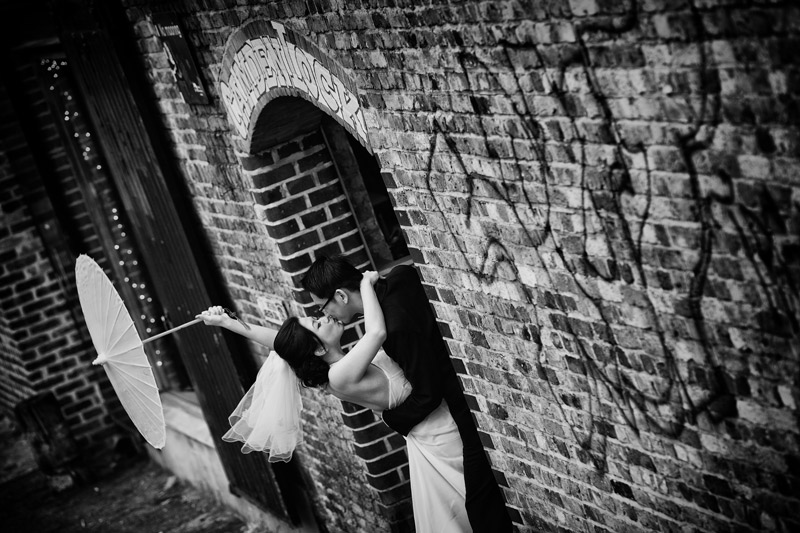
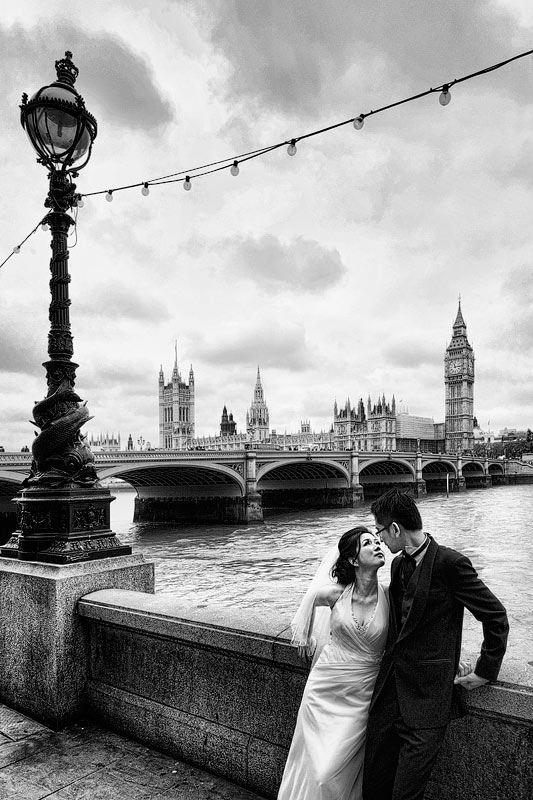
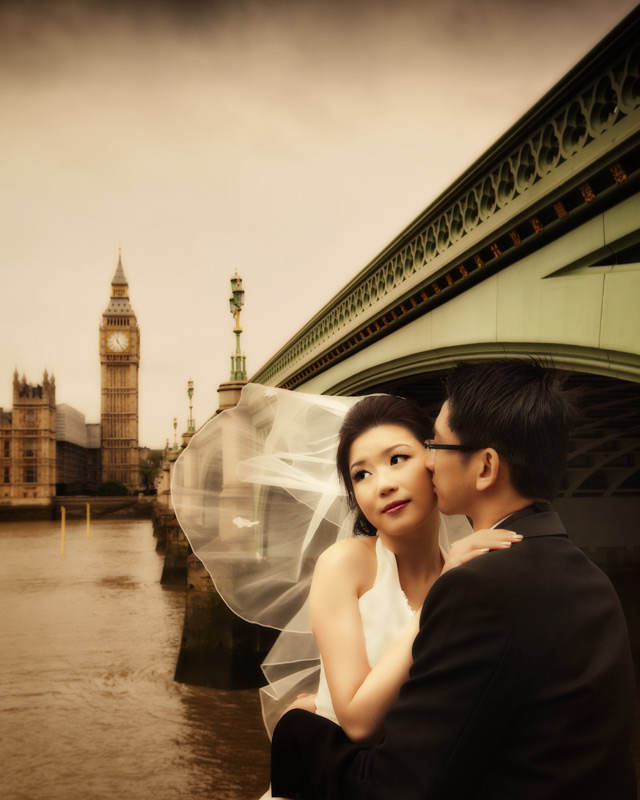
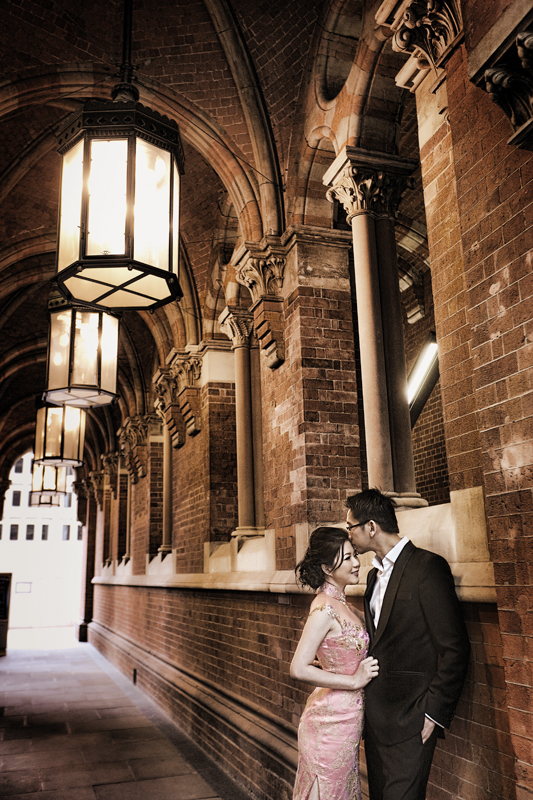
If you ask me, London just happens to be one of those places that I had to step out of my comfort zone, and there’s a tendency to go back to the previous (and often touristy) sites. When Ken and Lee Yen approached me to do a series in London, I actually sat down for a while to think about what more could I do in the location, trust me there are many photoshoots that are conducted there by other photographers from Singapore.
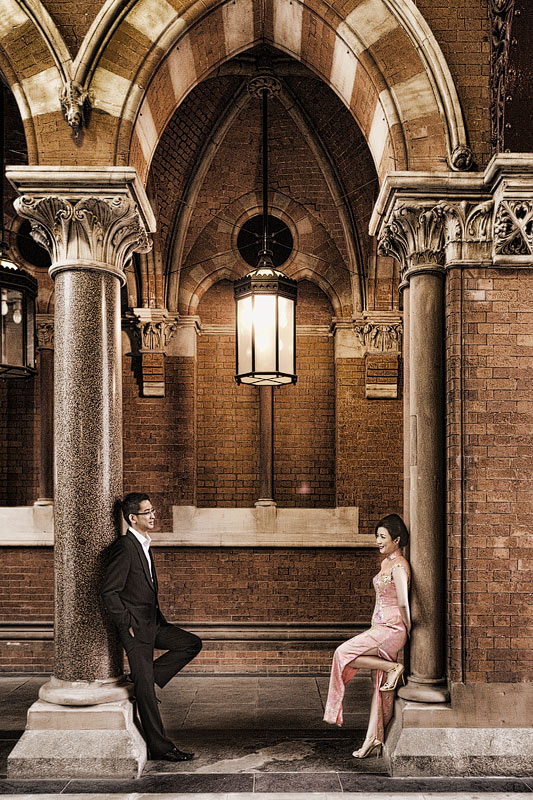
While the other part of me was drawn to this mystical charm of the busy city and for some strange reasons, someone showed me an image of Cannery Wharf underground station that really intrigued me.
I was attending the Master Photographers Association (UK) awards ceremony in Birmingham in Oct 2010, and just 10 days before I set off to UK, the job was confirmed. I knew I had to do something more to make this worth my while, and now looking at the series that just made it as one of my featured portfolios, the rain and 6-degree cold that we endured in the morning of the photo shoot finally paid off!
Oh by the way, the lovely Cheong Sum is designed by renown gown designer, Tan Yoong. Go check out this guy, he’s really one of the premier designers in Singapore.
![]()
1 month ago…
March 2011 had been a really busy month for us here in Lyrical Moments and above all the photo shoots, we had two overseas jobs at the beginning and end of the month.
ok, back to the present
I spent quite a bit of time reviewing and evaluating the photos that we have taken over the past month, not just because of the deadlines I had to meet to deliver the albums; I was looking around for the cornerstone images for Lyrical Moments and I don’t think I had to look very hard, which is a great thing! I was also preparing for the workshop-cum-demo this coming Tuesday and trying to find which are the images that are worth mentioning.
This is one series that I’ve shot in Melbourne that I will highlight some examples. I have photographed so many jobs in Melbourne, but this is one that we totally avoided the ‘common’ and ‘popular’ spots – especially those in the city (think Federation Square, Brighton Beach, Flinders Street station, the trams, etc). My couple was exceptionally conscientious when it came to location selection and we had the advantage of one of their friends who happens to be living in Melbourne to drive us around.
At the end of the day, we had really good fun creating the series!
![]()
 follow: